Universal Firmware Update Instruction for Rockchip RK2928, RK2918, RK3066 , RK3066 Based Tablet PC !!!
Attention:
1. make sure that the firmware matches your tablet. It will damage the tablet if upgraded by wrong firmware. problems arising from wrongly upgrading is due to users.
2. Please backup your data before upgrading, the internal storage will be formatted when upgrading, data will lost and unrecoverable.
3. Do not press reset key when the tablet is upgrading, and no operation is allowed when upgrading, in case of failure of upgrade.
4. Make sure that your tablet is with enough power, you’d better charge the tablet before upgrading, in case of upgrading failure due to low battery.
5. Please proceed in accordant with the instructions strictly.
Instructions of Installing Rockchip USB driver
Attention:
First Five Steps to Remember .
I am not the
Responsible for any damages , dead or bricked device . life is name of
Risk so you have to Risk at your own. These information are provided by
Professionals. 

1. make sure that the firmware matches your tablet. It will damage the tablet if upgraded by wrong firmware. problems arising from wrongly upgrading is due to users.
2. Please backup your data before upgrading, the internal storage will be formatted when upgrading, data will lost and unrecoverable.
3. Do not press reset key when the tablet is upgrading, and no operation is allowed when upgrading, in case of failure of upgrade.
4. Make sure that your tablet is with enough power, you’d better charge the tablet before upgrading, in case of upgrading failure due to low battery.
5. Please proceed in accordant with the instructions strictly.
Before upgrade
Please download the “upgrade tool” and USB driver from these link
Please download the corresponding firmware for your tablet from this link.
Upgrade instruction
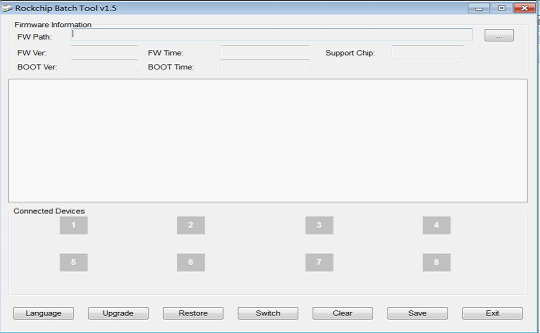
Unzip the upgrade tool, Run “RKBatchTool”.

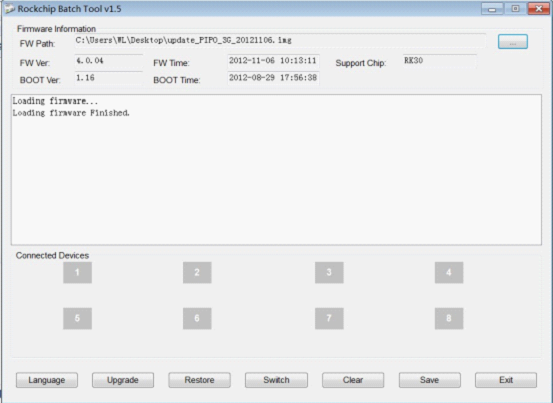
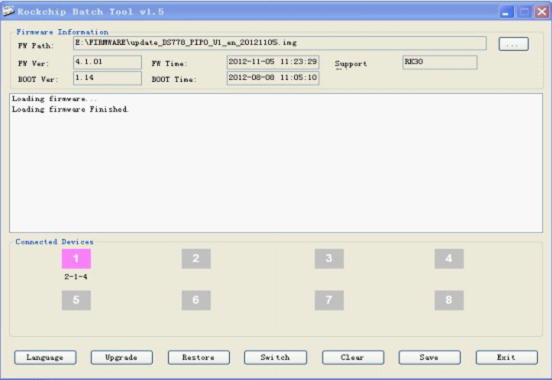
Click , choose the firmware downloaded. Then charge your tablet with power adaptor, and USB cable connects tablet to PC.
 , choose the firmware downloaded. Then charge your tablet with power adaptor, and USB cable connects tablet to PC.
Make you tablet set into upgrading mode.
A.)Rockchip Devices come along with different buttons formats . If your Tablet have 4 buttons Volume + Volume - /home or ESC button you should follow these steps.
A.)Rockchip Devices come along with different buttons formats . If your Tablet have 4 buttons Volume + Volume - /home or ESC button you should follow these steps.
Power off your tablet,
try to hold volume +/volume -/home/ESC button and power button, plug in
the USB cable, until your PC find new hardware.
If it not works, try to hold volume +/volume
-/home/ESC button and press power button for 3-5 times, until your PC
find new hardware.
B.)If your tablet have volume +/volume -/home/ESC button and power button alont with RESET hole then you should follow these steps.
B.)If your tablet have volume +/volume -/home/ESC button and power button alont with RESET hole then you should follow these steps.
If the your tablet has a reset hole and the
above two methods do not work, please hold volume +/volume -/home/ESC
button and press on reset hidden button, until your PC find new
hardware.
C.) If tablet have only Volume + / Volume - / Power button then you should following these steps to put your android tablet in boot mode .
Press volume + button , insert Usb cable , Press Power button slowly 3 to 5 time for 1 sec , when your computer found new hard ware release power button.
C.) If tablet have only Volume + / Volume - / Power button then you should following these steps to put your android tablet in boot mode .
Press volume + button , insert Usb cable , Press Power button slowly 3 to 5 time for 1 sec , when your computer found new hard ware release power button.
If you do the upgrading for the first time, please install the Rockchip USB driver in accordant with the bellowing instructions.
Instructions of Installing Rockchip USB driver
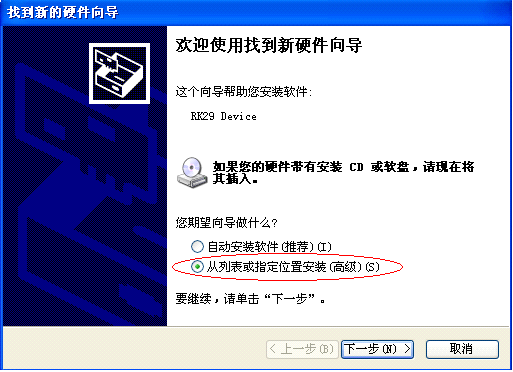
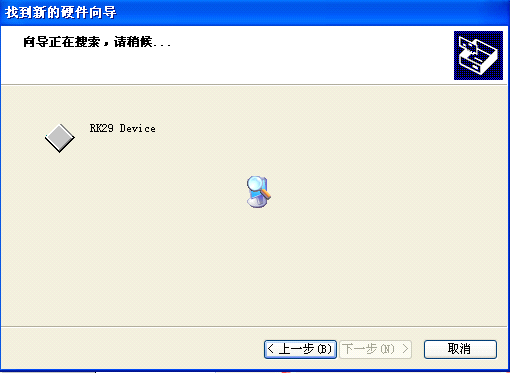
After your tablet enters
into upgrading mode, it will pop out a guide advising you that your PC
finds new hardware. Select manually install and then click “next”
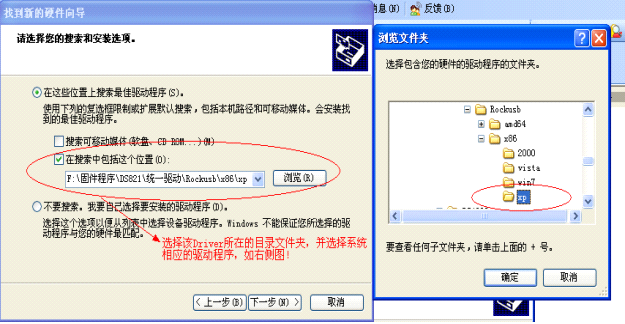
For Windows XP/2000 users

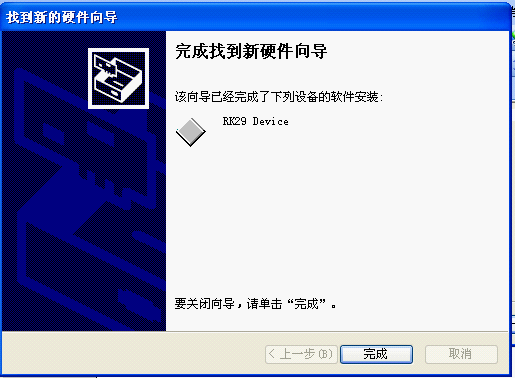
Select the USB driver in
accordant with your PC system, the driver is included in the
“RockusbDriver”. Then the PC will install the USB driver automatically.


After finishing USB installing, go back to upgrading.
For Windows Vista/7/8 users
If your PC is with Win7
or Vista system, it will not pop out the guide leading you to install
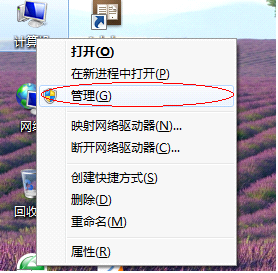
the driver, you get to install the driver in “My Computer”.
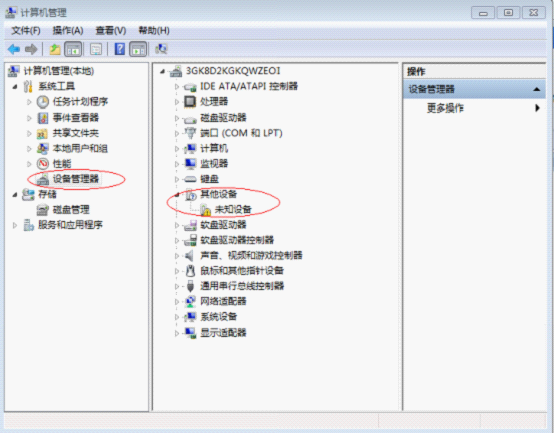
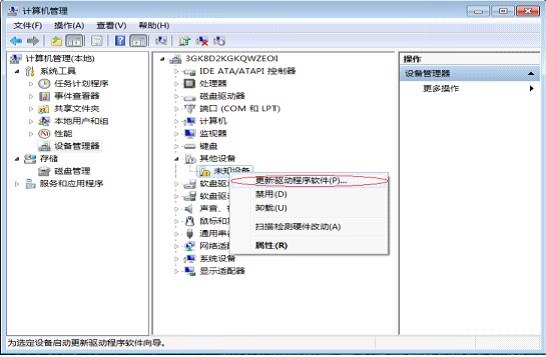
Right click “My Computer” , select “Device Manager”

There will be an “Unknown Device” with an exclamation mark appears.

Right click the “Unknown Device”, select “renew driver software”

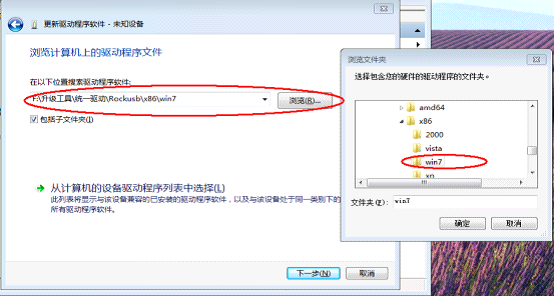
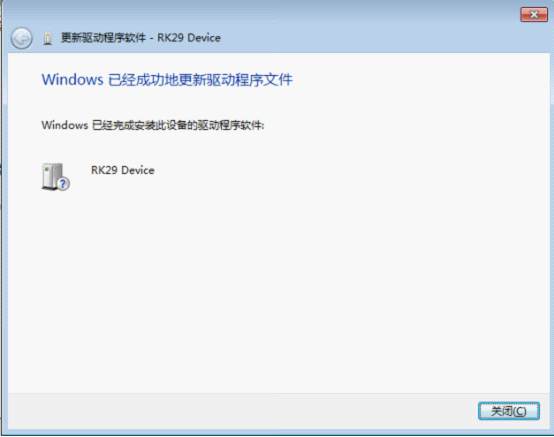
Load the USB driver included in the “RockusbDriver” to install the USB driver.


After finishing USB installing, go back to upgrading.
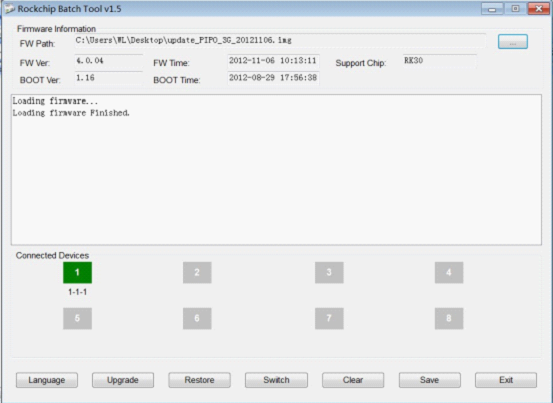
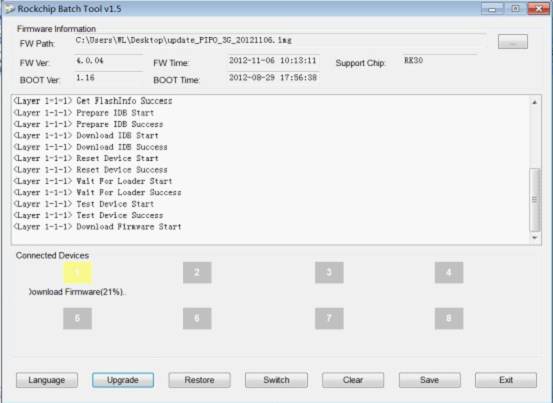
After install the USB driver, the device icon  turns green, click “upgrade” for upgrading. As the picture shows.
 turns green, click “upgrade” for upgrading. As the picture shows.
Note: If the device detected under the status of Pinky , please click “Switch”, the upgrading status will switch to Green (standby status)
 , please click “Switch”, the upgrading status will switch to Green (standby status)
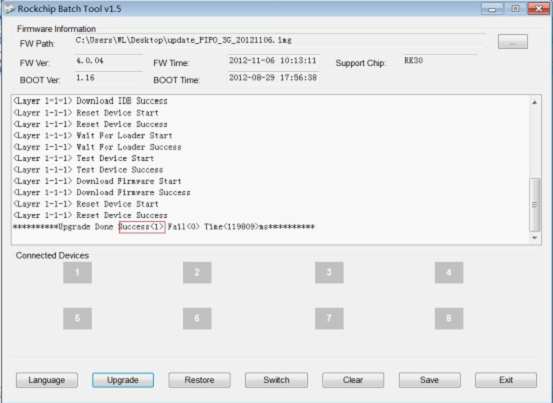
Below is the upgrading process.

The tablet will turn on automatically, then you could disconnect the tablet from the PC.

Enjoy
No comments:
Post a Comment